The Microsoft Management Console (MMC) is a powerful
addition to the system administrator’s arsenal. The MMC works as a
packager of system tools, enabling the system administrator to create
specialized tools that can then be used to delegate specific
administrative tasks to users or groups. Saved as MMC (.msc) files,
these custom tools can be sent by e-mail, shared in a network folder, or
posted on the Web. With system policy settings,
they can also be assigned to users, groups, or computers. The tools are
flexible enough to be modified, scaled up or down, and generally shaped
for any use to which you might want to put them.
Convenience Consoles
Windows Server 2003
comes with three Convenience Consoles, which are ready-made packages of
tools. All three of these are listed in the Administrative Tools menu.. Following are the names and descriptions of the three consoles:
Active Directory
Management
This console contains all the tools commonly used to administer Active
Directory. These tools are Active Directory Users and Computers, Active
Directory Domains and Trusts, Active Directory Sites and Services, and
Domain Name System (DNS).
IP Address Management
This console consists of the tools used to manage IP address resolution
and assignment: Dynamic Host Configuration Protocol (DHCP), Domain Name
System (DNS), and Windows Internet Naming Service (WINS).
Public Key Management
This console includes the tools to manage certificates, certification
authorities, and registration authorities that are part of your
public-key infrastructure. The tools are Certificate Authority,
Certificate Templates, Certificates for Local Computer, and Certificates
for Current User.
In addition, you’ll
probably create your own Convenience Consoles based on the needs of your
network. To build a custom MMC, you can either start with an existing
console and modify it or start from scratch.
Creating an MMC-Based Console with Snap-Ins
Building your own tools
with the MMC standard user interface is a straightforward process. The
next few sections walk you through the creation of a new console and
describe how to arrange its administrative components into separate
windows.
Note
In the following steps, you should not have the console window or any other window in the MMC you are creating maximized.
1. | Click Start and select Run. In the Open text box, type mmc and then click OK. An empty MMC window opens, as shown in Figure 1, ready for you to add snap-ins.
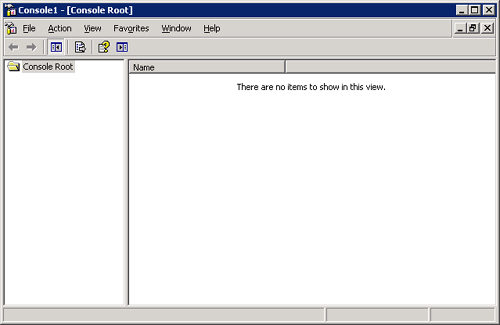
|
2. | From
the File menu, select Add/Remove Snap-In. (The menu commands on the
menu bar at the top of the MMC window apply to the entire console.) The
Add/Remove Snap-In dialog box opens. Here you can choose which snap-ins
to place in the console file and enable extensions. In the Snap-Ins
Added To box, accept the default, Console Root.
|
3. | Click Add. This opens a dialog box listing the snap-ins installed on your computer. (See Figure 2.)

|
4. | Select
a snap-in to see a description of its function. Double-click a snap-in
to add it to the console. For this example, we’ll add Computer
Management. Select the computer to manage, as shown in Figure 3.
|
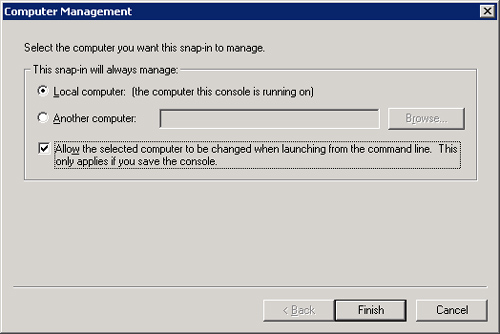
5. | Select
the Local Computer option, and select the Allow The Selected Computer
To Be Changed When Launching From The Command Line check box. These
options are common to many of the snap-ins. Click Finish.
|
6. | From
the Add Standalone Snap-In dialog box, select Event Viewer and click
Add. As you did before, select the Local Computer option and select the
Allow The Selected Computer To Be Changed When Launching From The
Command Line check box. Click Finish, and then close the list of
available snap-ins. The Add/Remove Snap-In dialog box lists two
snap-ins: Computer Management (Local) and Event Viewer (Local).
|
7. | Click
the Extensions tab. By default, the Add All Extensions check box is
selected, which means that when this console is opened on a particular
machine, all extensions that are locally installed on that machine will
be used. If this check box isn’t selected, only extensions that are
selected on the list of available extensions will be loaded.
|
8. | Click
OK to close the Add/Remove Snap-In dialog box. The Console Root window
now has two snap-ins, rooted at the Console Root folder.
|
9. | Save
the console by choosing Save from the Console menu. You are prompted
for a name—be as descriptive as possible. The file is saved in the
Administrative Tools folder
by default. This folder is part of your profile, so an added benefit is
that if you use roaming profiles, any tools you create go with you.
Note
Windows Server 2003
R2 includes a new version of MMC – MMC v3. By default, the new
interface is turned off, and you’ll see the screens described above when
you go to create your own console. You can enable the new, three pane,
interface by adding the following registry key:
HKEY_LOCAL_MACHINE\SOFTWARE\Microsoft\MMC\UseNewUI. Frankly, we don’t
see any particular reason to do so, but go ahead and try it. The one
area where we see a definite improvement is in the new UI for adding and
removing snap-ins, but the new action pane doesn’t improve anything for
us.
|
Customizing the Layout of a Console
After you’ve added
the snap-ins, you can provide different administrative views in the
console by adding windows. To create one window for each of the
snap-ins, follow these steps:
1. | In
the left pane of the console window, right-click the Computer
Management folder and select New Window From Here from the shortcut
menu. This opens a new Computer Management window rooted at the Computer
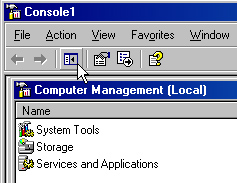
Management snap-in. Click the Show/Hide Console Tree toolbar button,
shown in Figure 4.
|
2. | In
the Console Root window, right-click the Event Viewer folder and select
New Window From Here. Click the Show/Hide Console Tree toolbar button.
|
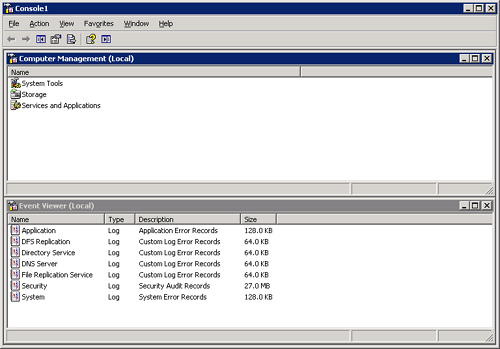
3. | Close the original Console Root window. From the Window menu, choose Tile Horizontally. The console window will look like Figure 5.
|
Note
that the buttons and menus apply only to the active window. Remember to
save your console file after completing the changes.
Setting Options for a Console File
When creating consoles
for workgroup managers or other users, you can restrict how the console
is used. Console options can be set so that users can access only the
tools that the administrator allows. To set console file options, follow
these steps:
1. | With the console open, select Options from the File menu. This opens the Options dialog box.
|
2. | Click the Console tab. Choose one of the following console modes:
- Author Mode This mode has no restrictions. The user can access all parts of the console tree as well as change this console file at will.
- User Mode—Full Access
The user can access all parts of the console tree but cannot make
changes that affect functionality. Cosmetic changes, such as the
arrangement of windows, are saved automatically.
- User Mode—Limited Access, Multiple Windows
The user can access only the parts of the console that were visible at
the time the console file was saved. Users can create new windows but
can’t close existing ones.
- User Mode—Limited Access, Single Window The same as the previous mode, except that only one window is visible. Users cannot create new windows.
|
3. | In
all but author mode, you can also select the Do Not Save Changes To
This Console option, so that the console always opens in the same view.
You can also select the Allow The User To Customize Views option. This
allows the user to add windows rooted in the tools in the MMC.
|
4. | Click OK, and save the console file.
|
Modifying Console Files
After you’ve saved a
console file in any mode other than author mode, the Console menu no
longer includes options for disallowed actions, such as adding another
snap-in. This prevents the user from changing the settings.
To modify a console file, open a command-prompt window and type mmc /a.
The /a switch specifies author mode, overriding any user mode setting,
and opens the console window, from which you can open any console file
and make changes.
Note
The system
administrator can and should set user profiles to disallow the use of
the /a switch to ensure that inappropriate modifications can’t be made.
Or use Group Policy to disable it by enabling the Restrict The User From
Entering Author Mode policy in User Configuration\Administrative
Templates\Windows Components\Microsoft Management Console.
Distributing and Using Consoles
As mentioned
earlier, the default location for saved console files is the
Administrative Tools folder. Console files can be distributed in a
variety of ways. You can copy a console file to a shared folder on the
network, or you can mail it to another person by right-clicking the
file, pointing to Send To, and selecting Mail Recipient. When you assign
a console to be used by a particular person, be sure that the person’s
user profile includes permission to access the tools and services in the
console. The user also has to have any administrative permissions
necessary to use the system components administered by the console.
If you know the
location of a console, you can open it using Windows Explorer by
clicking it as you would any other file. You can also open it from the
command line. For example, to open the DHCP management console from the
command line, type dhcpmgmt.msc. (For consoles that are not on your path, you’ll need to specify the path to the console.)
Using MMC for Remote Administration
MMC-based tools are
admirably suited for remote administration. You can easily construct a
console to administer a number of computers or a single machine. This
section describes how to create a console that can be used to remotely
administer another computer. The console includes the Services snap-in,
which manages system services, and the Event Viewer snap-in, which
allows access to the various event logs. To create this remote
administration console, follow these steps:
1. | Click Start, and then select Run. In the Open text box, type mmc and then click OK. An empty MMC window opens.
|
2. | From the File menu, select Add/Remove Snap-In. The Add/Remove Snap-In dialog box opens.
|
3. | Click Add to open the Add Standalone Snap-In dialog box.
|
4. | Select Services, and then click Add.
|
5. | In
the This Snap-In Will Always Manage area, select Another Computer and
then click Browse. This opens another Select Computer dialog box.
|
6. | Highlight the computer you want this snap-in to manage, and then click OK. Click Finish.
|
7. | Repeat
steps 4 through 6, except choose the Event Viewer snap-in. Close the
Add Standalone Snap-In dialog box. Click OK in the Add/Remove Snap-In
dialog box.
|
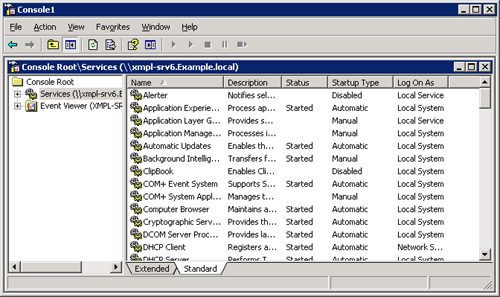
8. | At this point, the console will look like the one in Figure 6.
Save it under a descriptive name. You can use this console to view
events on the remote machine and to start and stop services.
|
As you can see, consoles
can be configured in dozens, if not hundreds, of different ways and then
distributed. Snap-ins for every imaginable function will increasingly
be available from Microsoft as well as third-party suppliers.